Before you start:
- Add the right Authorisation to the User(s) who need to authorise invoices.
- Add administration(s) to the User(s) for which they need to authorise. See for more information this link.
- Go to Settings (cogwheel) > Authorisation and then click Add.
- Give the authorisation schedule a recognisable description.
Set up workflow
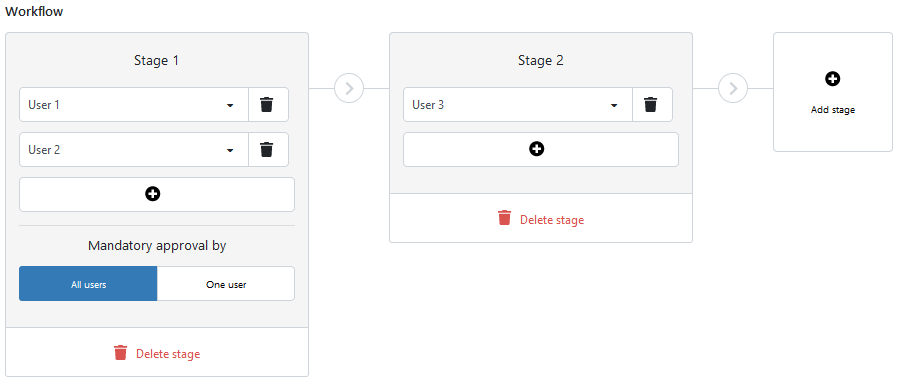
Next, you need to set up the workflow. It contains one or more phases with one or more users who will approve the documents. The document to be authorised first passes through phase 1. When this is completed, the document moves on to phase 2, etc. A schedule can contain up to 5 phases.
- Click the button with the Plus sign. Phase 1 becomes available.
- Select a User in Phase 1.
- If necessary, add another User using the Plus button. You can add a maximum of 10 Users to one phase.
- If you add more than one User to a phase, an additional setting becomes available:
- All Users: All Users in this phase must compulsorily approve the document.
- One User: One of the Users in this phase must approve the document.
- Click Add Phase to add a new phase, up to a maximum of 5 phases.
- Click Delete Phase to remove a phase from the workflow.

Set up administration
Finally, you determine which administration(s) the authorisation schedule should apply to. You can only link an administration to one authorisation schedule.
Is the administration not in the list of ‘Available administrations’? Then it is already linked to another authorisation schedule.
Other important points
As soon as an authorisation schedule has been created, the column Authorisation under Settings (cogwheel) > Administrations shows for which administrations an authorisation schedule has been activated.